Crawlspace Encapsulations: The Key to a Healthier, More Efficient Home
Most homeowners rarely think about what lies beneath their floors — until problems arise. Your crawlspace might be out of sight, but it shouldn’t be out of mind. A neglected crawlspace can harbor moisture, mold, pests, and even structural issues. Fortunately, there’s a proactive solution gaining popularity among contractors and energy experts alike: Crawlspace Encapsulations.
Encapsulating your crawlspace means sealing it off from external moisture and unconditioned air, creating a clean, dry, and energy-efficient space. In this article, we’ll dive deep into what crawlspace encapsulation is, why it matters, how it’s done, the benefits it provides, and why it could be one of the best investments you make in your home’s future.
What Is Crawlspace Encapsulation?
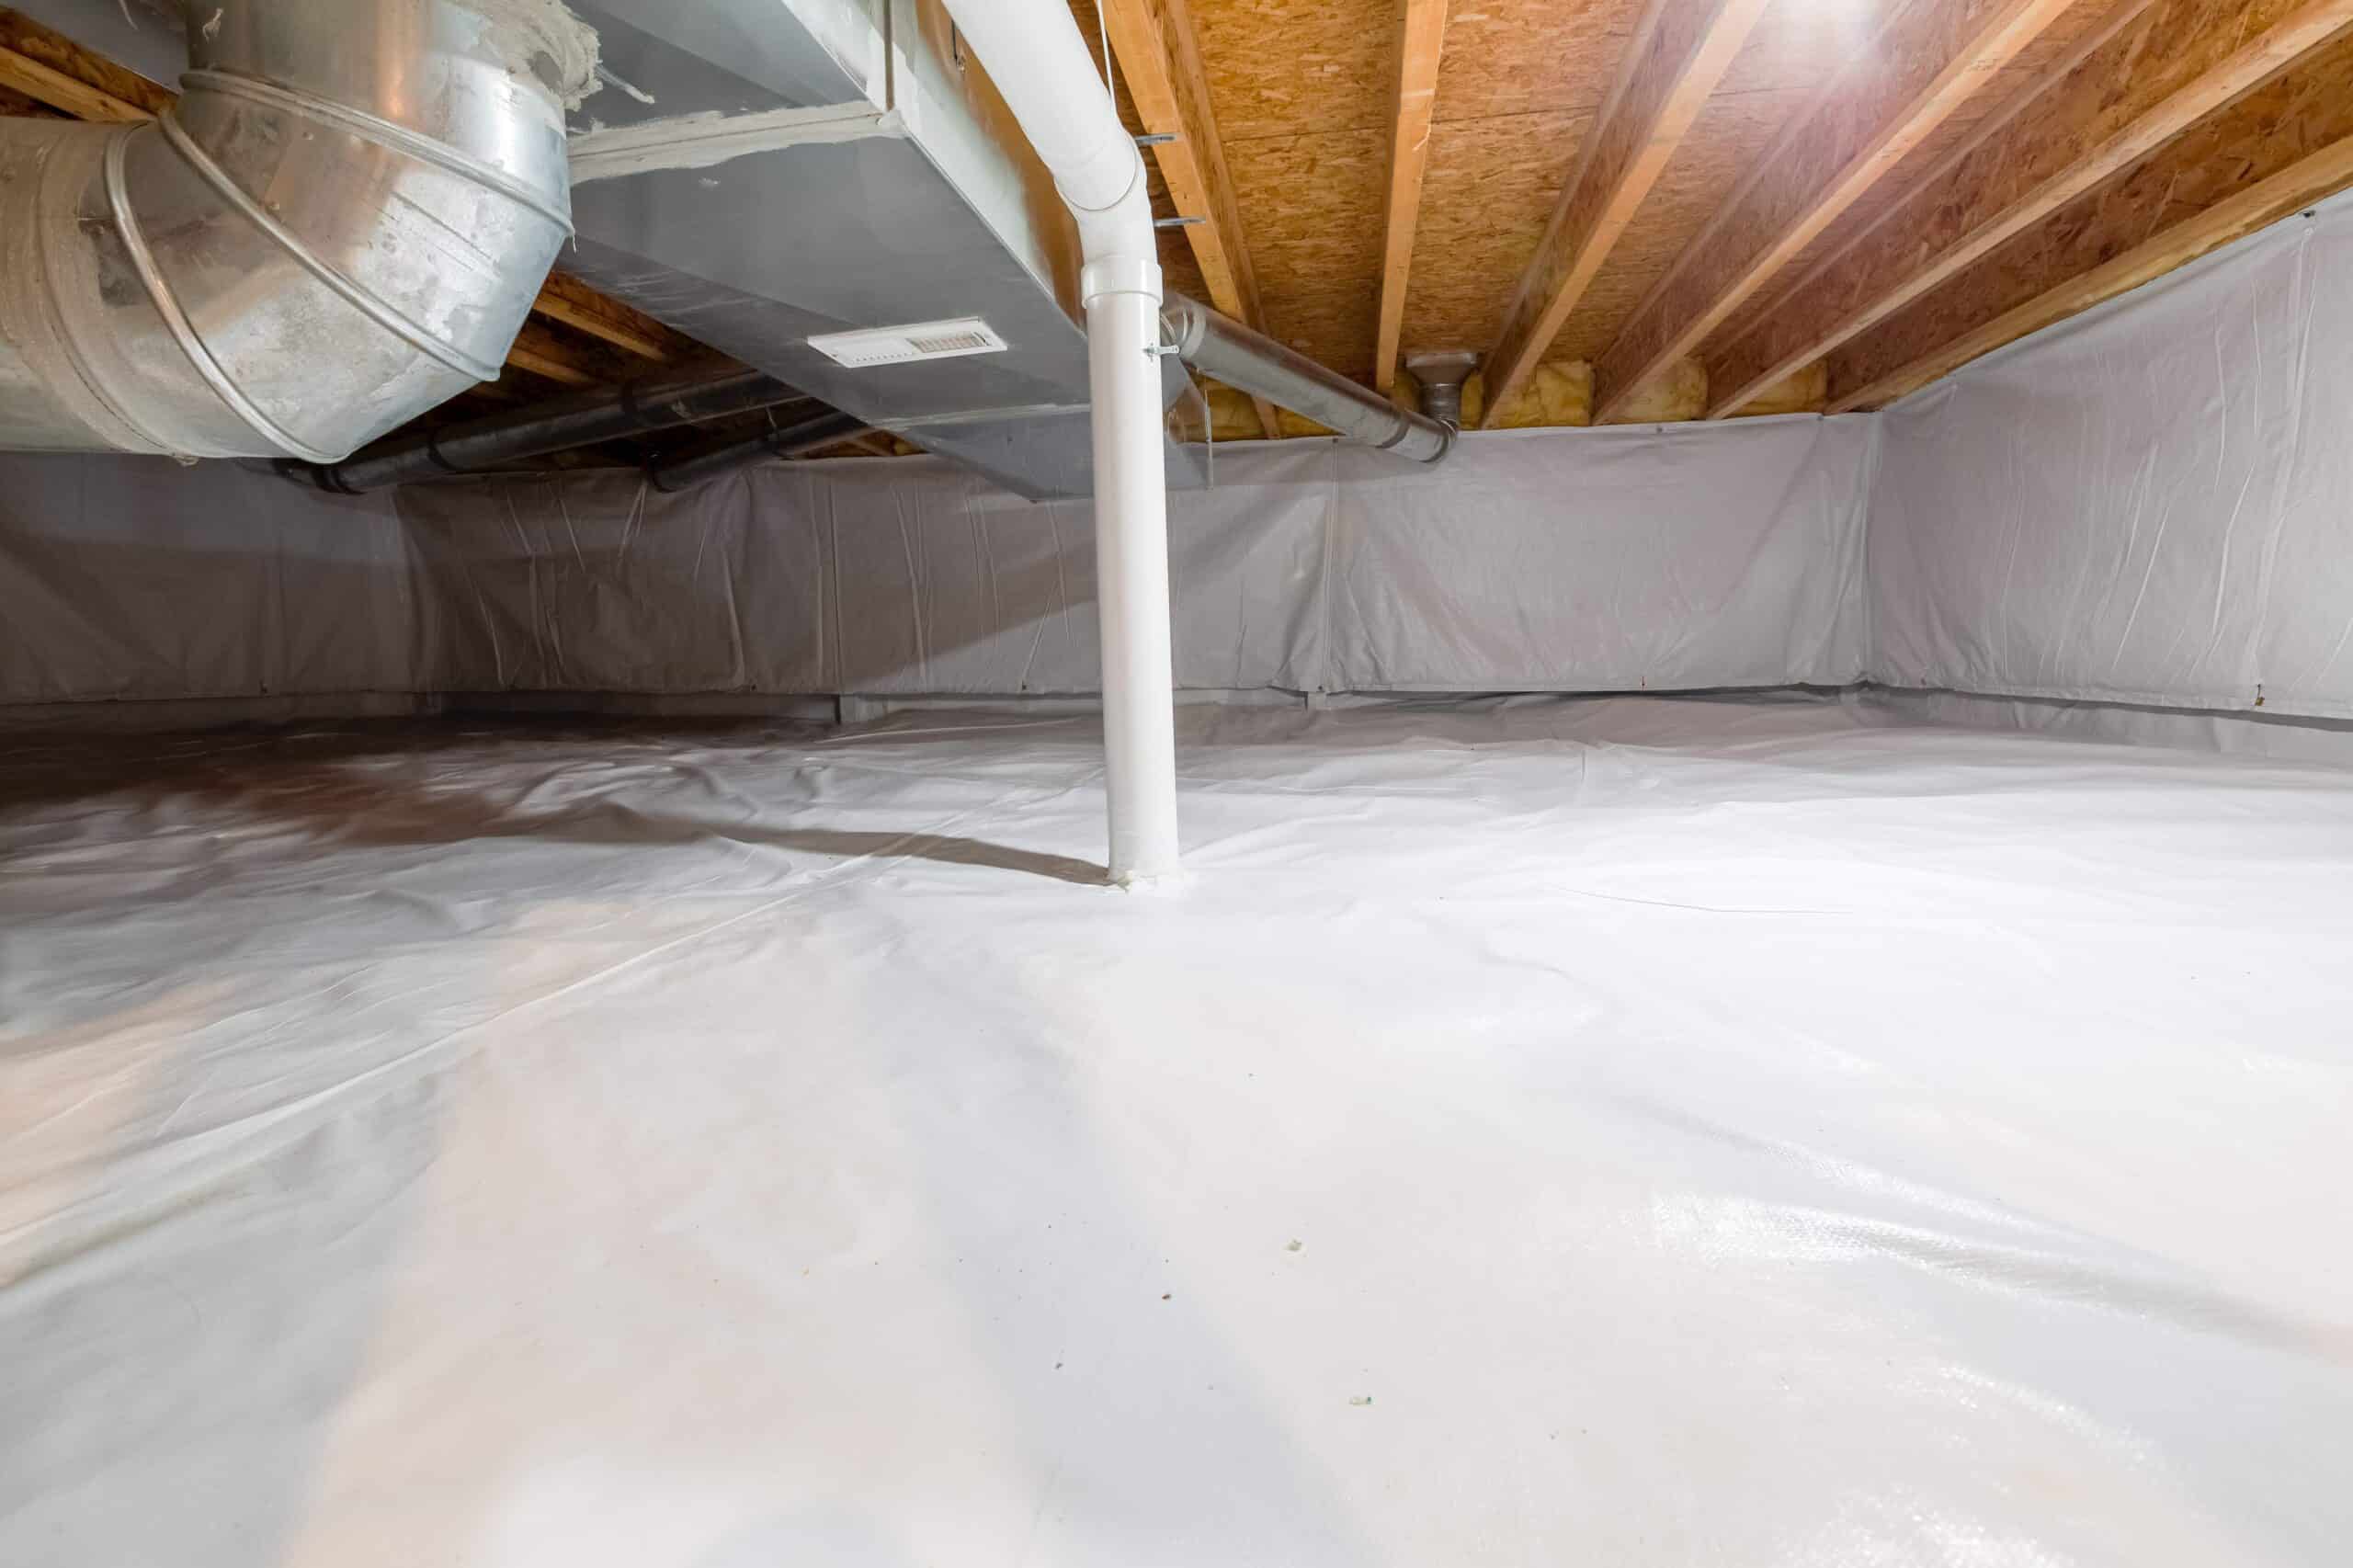
Crawlspace encapsulation is the process of sealing the floor, walls, and sometimes even the ceiling of a crawlspace with a heavy-duty moisture barrier — typically reinforced polyethylene plastic. The goal is to isolate the space from outside air, groundwater, and humidity, creating a conditioned environment beneath your home.
This process may also include:
- Installing a vapor barrier over soil and walls
- Sealing vents and air leaks
- Adding insulation
- Installing a dehumidifier or sump pump (if needed)
- Ensuring proper drainage
The result is a cleaner, drier crawlspace that protects the rest of your home from moisture and improves overall indoor air quality.
Why Encapsulation Is Necessary
Crawlspaces are notorious for being damp, dirty, and problematic. Unsealed crawlspaces often suffer from:
1. Moisture Buildup
Whether from poor drainage, groundwater seepage, or open vents allowing in humid air, moisture easily builds up in crawlspaces. This damp environment becomes a breeding ground for mold, mildew, and wood rot.
2. Poor Air Quality
Nearly 50% of the air you breathe on the first floor of your home comes from your crawlspace. If that space is filled with mold spores, dust mites, and allergens, your indoor air quality suffers.
3. Energy Loss
Unsealed crawlspaces allow air to flow freely, making your HVAC system work harder to heat or cool your home. Insulated and sealed crawlspaces reduce energy waste.
4. Pest Intrusion
Rodents, termites, and insects love the cool, damp conditions found in crawlspaces. Encapsulation keeps them out by eliminating access points and the dampness they thrive on.
Signs You May Need Crawlspace Encapsulation
Not sure if encapsulation is right for your home? Here are common warning signs that your crawlspace may need attention:
- A musty smell throughout the home
- Cold or uneven floors above the crawlspace
- Visible mold or mildew
- High indoor humidity
- Wood rot or sagging floor joists
- Recurring pest problems
- Frequent allergies or respiratory issues
A professional inspection can determine whether Crawlspace Encapsulations will address your specific problems.
The Crawlspace Encapsulation Process
Here’s a step-by-step look at how encapsulation is typically performed:
1. Inspection and Cleaning
A qualified technician will assess the current condition of your crawlspace. Any standing water, mold, or debris must be removed. This might also include repairing damaged insulation or structural wood.
2. Waterproofing
Before sealing, it’s essential to manage groundwater and rain runoff. This may involve regrading, adding gutters, or installing a sump pump and perimeter drain system.
3. Sealing Vents and Air Leaks
Crawlspace vents are sealed to prevent humid air from entering. Gaps around pipes, electrical lines, and ductwork are also closed with spray foam or caulk.
4. Installing a Vapor Barrier
A thick vapor barrier (at least 12-20 mil) is laid over the ground and up the walls. The seams are sealed with waterproof tape, and the liner is securely fastened to prevent movement.
5. Insulation and Conditioning
Depending on climate, foam board insulation or spray foam is applied to walls or rim joists. A dehumidifier may be added to keep the space dry and conditioned.
6. Final Testing and Maintenance
After installation, humidity levels and air quality are tested. Some systems require occasional checks or filter changes on the dehumidifier.
Key Materials Used in Encapsulation
A successful encapsulation depends on the quality of the materials. Here’s what’s typically involved:
- Vapor Barrier: Reinforced polyethylene liner, 12-20 mil thick
- Seam Tape: High-strength adhesive tape for securing barrier edges
- Insulation: Rigid foam board or closed-cell spray foam
- Dehumidifier: Energy-efficient models designed for enclosed crawlspaces
- Drainage System: French drains, sump pumps, or drain matting where necessary
- Vent Covers: Airtight and insulated to block moisture-laden outdoor air
Benefits of Crawlspace Encapsulations
Encapsulating your crawlspace offers a long list of benefits, many of which contribute to long-term cost savings and home comfort:
1. Improved Indoor Air Quality
By reducing moisture, mold, and allergens, encapsulation promotes cleaner, healthier air inside your home — especially important for people with allergies or asthma.
2. Energy Efficiency
A sealed and insulated crawlspace helps maintain consistent indoor temperatures, reducing heating and cooling costs by up to 20% in some cases.
3. Moisture and Mold Control
The vapor barrier prevents groundwater and humidity from seeping into your crawlspace, stopping mold growth before it starts.
4. Increased Home Value
A dry, clean, and encapsulated crawlspace is a major selling point for homebuyers and often adds to the resale value of your property.
5. Pest Prevention
Encapsulation closes off entry points and removes the moisture that attracts pests, helping protect against infestations.
6. Structural Protection
By reducing moisture and mold, crawlspace encapsulation protects wooden framing and subflooring from decay, sagging, or warping.
Cost of Crawlspace Encapsulation
The cost of crawlspace encapsulation varies depending on:
- Size of the crawlspace
- Existing damage or water issues
- Required drainage or mold remediation
- Quality and thickness of the vapor barrier
- Addition of insulation or a dehumidifier
On average, homeowners can expect to pay between $5,000 and $15,000, though complex or large spaces may cost more. While this may seem like a significant upfront investment, the long-term energy savings, comfort, and reduced risk of repairs make it cost-effective over time.
DIY vs. Professional Installation
While DIY encapsulation kits are available, professional installation is recommended for several reasons:
- Proper Sealing: Pros ensure all seams, walls, and penetrations are thoroughly sealed.
- Drainage and Waterproofing: Professionals can design systems to handle existing or future water intrusion.
- Mold Remediation: If mold is present, pros have the tools and training to remove it safely.
- Dehumidifier Sizing: A pro ensures the dehumidifier is correctly sized for the space.
- Warranty: Most professional encapsulations come with a multi-year warranty.
Unless your crawlspace is extremely small and dry, hiring a professional ensures long-lasting results.
Long-Term Maintenance
After your crawlspace is encapsulated, minimal maintenance is required. However, to keep everything running smoothly:
- Check the dehumidifier’s filter and drain hose quarterly
- Inspect for tears or damage to the vapor barrier annually
- Make sure the sump pump (if installed) is working correctly
- Monitor humidity levels (should stay below 60%)
Conclusion
Crawlspace Encapsulations are one of the most effective ways to improve your home’s air quality, energy efficiency, and long-term structural health. By sealing your crawlspace from the harmful effects of moisture, humidity, and outdoor air, you protect your investment while creating a more comfortable, efficient living environment.
If you’ve noticed musty odors, cold floors, high energy bills, or signs of mold, now is the time to take action. Crawlspace encapsulations provide peace of mind, knowing that your home is protected from the ground up.
Don’t wait until damage becomes irreversible. Consult a trusted professional to see if encapsulation is right for your home, and take the first step toward a healthier, more resilient foundation for your life.